So for my next trick, I wanted to see (hear?) what audio was like on the Arduino.
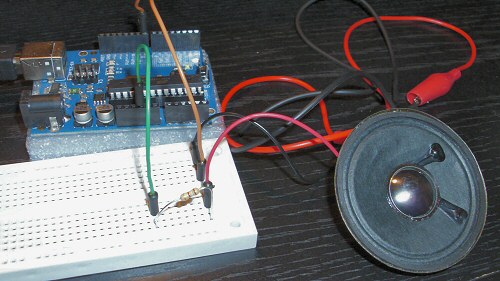
In theory, it’s nothing – connect the speaker to the Ground and pin 8, one wire each, and then run the example sketch ToneMelody (in the 2.Digital section), which plays out of pin 8 (note that the code runs once and stops – during testing, if you need constant audio, just switch the function names “setup” with “loop” in the code, and the audio will repeat tirelessly).
Of course, by now I was aware that simple isn’t always safe. Some examples show a resistor; some don’t. What to do?
Out came Ohm’s Law: since no pin could provide more than 40mA (maximum), I knew that 125 ohms was the minimum in this path (I don’t know anything about impedance, or how much actual current was passing through the speaker because of the waveform – I was playing it safe). I also knew my speaker was 8 ohms, so in theory I could use a 117ohm resistor and be safe. Of course, getting that close to the maximum was silly; after all, my resistors were 5% tolerance, which meant that my mythical 117ohm could be about 6ohms high or low. So I opted for a 1Kohm resistor for the first test, which put a ceiling on current of only about 5mA [5v / (1000+8)ohm].
Quiet, but I heard it – a little tune:

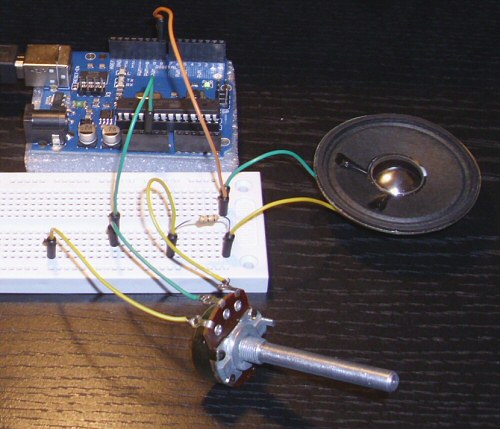
I am truly grateful for alligator clips, as I was able to hook it up and get going in no time. Of course, now I knew it worked, it was time to lose the clips, so I quickly soldered two jumpers (actually one jumper split in two) to the ends of the speaker for easy use:

I also took the time to put in a lower resistor (180ohm) as well as a potentiometer I’d soldered more jumpers to. The result was a simple volume control: through the ‘pot’ (the extra yellow lead is not connected, just put there to get it out of the way), through the 180ohm resistor (so there is always a minimum safe resistance), then through the speaker and back to pin 8. Now I have s speaker to play with, and a volume control so as to not wake up the missus. Joy!

This is a great article unfortunately there is an error in it please correct the following sentence.
“So I opted for a 1Kohm resistor for the first test, which put a ceiling on current of only 0.5mA [5v / (1000+8)ohm].”
to
“So I opted for a 1Kohm resistor for the first test, which put a ceiling on current of only 5mA [5v / (1000+8)ohm].”
Corrected
Useful, thank you from a rooky in electronics 🙂